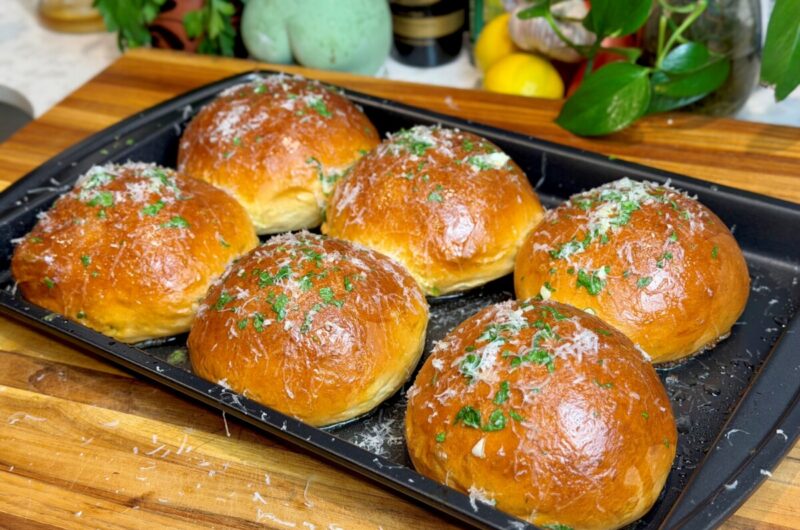
These Japanese milk buns are incredibly soft, fluffy, and slightly sweet, with the kind of pillowy texture that makes them perfect for everything from dinner rolls to homemade hamburger buns. The secret is tangzhong, a simple mixture of flour, milk, and water that is cooked before being added to the dough.
Cooking a portion of the flour and liquid first allows the dough to hold onto more moisture, giving the finished buns their signature tender texture while also helping them stay soft longer.
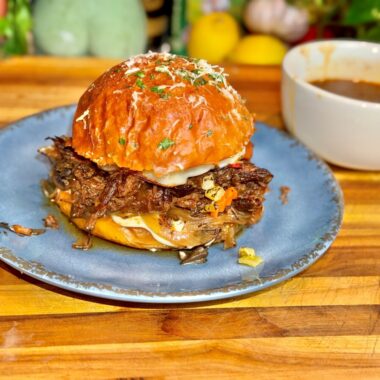
I especially love these for burgers. They have the richness of a brioche-style bun without being overly heavy or sweet. Brush them with egg wash before baking for that glossy golden top, then finish them with a little melted butter while they’re still warm.
What will you need?
Tangzhong
- Whole Milk
- Water
- Bread Flour
Milk Bun Dough
- bread flour
- granulated sugar
- instant yeast
- salt
- whole milk
- large egg
- unsalted butter, softened
Egg Wash
- large egg
- whole milk
For Finishing
- parsley garlic butter, optional
- Grated Parmesan, optional
How to make it
Make the Tangzhong
Add the bread flour, milk, and water to a small saucepan and whisk until smooth.
Cook over medium-low heat, stirring constantly, for about 2–3 minutes, or until the mixture thickens into a smooth paste. When you drag your spatula across the bottom of the pan, it should briefly leave a visible trail.
Remove from the heat and allow it to cool until just warm.
Make the Dough
Add the bread flour, sugar, instant yeast, and salt to the bowl of a stand mixer fitted with the dough hook.
Add the warm milk, egg, and cooled tangzhong.
Mix on low speed until everything comes together into a shaggy, sticky dough.
Continue kneading for about 5 minutes before gradually adding the softened butter.
Once the butter has incorporated, continue kneading on low to medium-low speed for another 8–12 minutes.
The dough will initially be sticky, but resist adding additional flour. As the gluten develops, it should become smooth, elastic, and begin pulling away from the sides of the bowl.
Check the Dough
Pinch off a small piece of dough and gently stretch it between your fingers.
The dough is ready when you can stretch it into a thin, translucent membrane without it immediately tearing. This is known as the windowpane test.
If it tears while still thick, continue kneading for another 2–3 minutes and test again.
First Rise
Shape the dough into a ball and place it in a lightly greased bowl.
Cover with plastic wrap and let rise in a warm place for 60–90 minutes, or until roughly doubled in size.
Shape the Buns
Turn the dough onto a clean work surface and gently press out some of the excess gas.
For hamburger buns, divide the dough into approximately 105 g portions.
Shape each portion into a tight, smooth ball by pulling the edges underneath and creating tension across the top.
Place the buns seam-side down on a parchment-lined baking sheet with plenty of space between them.
Gently press each ball down with your palm to create a slightly flatter shape. This helps the dough spread outward as it proofs rather than producing a tall dinner-roll shape.
Second Rise
Lightly spray the underside of a piece of plastic wrap with cooking spray and loosely cover the buns.
Let them proof for approximately 45–60 minutes, or until noticeably puffy and about 1½ times their original size.
To check them, gently press the side of a bun with your fingertip. The indentation should slowly spring back while leaving a slight impression.
If it immediately springs back, give the buns more time.
Bake
Preheat the oven to 350°F (175°C).
Whisk together the egg and milk and gently brush the tops of the proofed buns.
Sprinkle with sesame seeds if desired.
Bake for 18–22 minutes, or until beautifully golden brown. The center of the buns should reach approximately 190°F.
Finish
As soon as the buns come out of the oven, lightly brush the tops with melted butter.
Let them cool on a wire rack before slicing.
Japanese Milk Buns
Course: SidesCuisine: JapaneseDifficulty: iNTERMEDIATE4
servings30
minutes40
minutes300
kcalIngredients
- Tangzhong
25 g (3 tablespoons) bread flour
120 ml (½ cup) whole milk
30 ml (2 tablespoons) water
- Milk Bun Dough
360 g (3 cups) bread flour
50 g (¼ cup) granulated sugar
7 g (2¼ teaspoons) instant yeast
1 teaspoon kosher salt
90 ml (6 tablespoons) whole milk, warm
1 large egg, room temperature
All of the prepared tangzhong
56 g (¼ cup) unsalted butter, softened
- Egg wash
1 large egg
1 tablespoon whole milk
- For finishing
parsley, garlic, and butter melted together
grated parmesan
Directions
- Make the Tangzhong
- Add the bread flour, milk, and water to a small saucepan and whisk until smooth.
Cook over medium-low heat, stirring constantly, for about 2–3 minutes, or until the mixture thickens into a smooth paste. When you drag your spatula across the bottom of the pan, it should briefly leave a visible trail.
Remove from the heat and allow it to cool until just warm. - Make the Dough
- Add the bread flour, sugar, instant yeast, and salt to the bowl of a stand mixer fitted with the dough hook.
Add the warm milk, egg, and cooled tangzhong.
Mix on low speed until everything comes together into a shaggy, sticky dough.
Continue kneading for about 5 minutes before gradually adding the softened butter.
Once the butter has incorporated, continue kneading on low to medium-low speed for another 8–12 minutes.
The dough will initially be sticky, but resist adding additional flour. As the gluten develops, it should become smooth, elastic, and begin pulling away from the sides of the bowl. - Check the Dough
- Pinch off a small piece of dough and gently stretch it between your fingers.
The dough is ready when you can stretch it into a thin, translucent membrane without it immediately tearing. This is known as the windowpane test.
If it tears while still thick, continue kneading for another 2–3 minutes and test again. - First Rise
- Shape the dough into a ball and place it in a lightly greased bowl.
Cover with plastic wrap and let rise in a warm place for 60–90 minutes, or until roughly doubled in size. - Shape the buns
- Turn the dough onto a clean work surface and gently press out some of the excess gas.
For hamburger buns, divide the dough into approximately 105 g portions.
Shape each portion into a tight, smooth ball by pulling the edges underneath and creating tension across the top.
Place the buns seam-side down on a parchment-lined baking sheet with plenty of space between them.
Gently press each ball down with your palm to create a slightly flatter shape. This helps the dough spread outward as it proofs rather than producing a tall dinner-roll shape. - Second Rise
- Lightly spray the underside of a piece of plastic wrap with cooking spray and loosely cover the buns.
Let them proof for approximately 45–60 minutes, or until noticeably puffy and about 1½ times their original size.
To check them, gently press the side of a bun with your fingertip. The indentation should slowly spring back while leaving a slight impression.
If it immediately springs back, give the buns more time. - Bake
- Preheat the oven to 350°F (175°C).
Whisk together the egg and milk and gently brush the tops of the proofed buns.
Sprinkle with sesame seeds if desired.
Bake for 18–22 minutes, or until beautifully golden brown. The center of the buns should reach approximately 190°F. - Finish
- As soon as the buns come out of the oven, lightly brush the tops with the melted butter, garlic, and parsley. Grate over parmesan cheese.
Let them cool on a wire rack before slicing. Hope you enjoy!